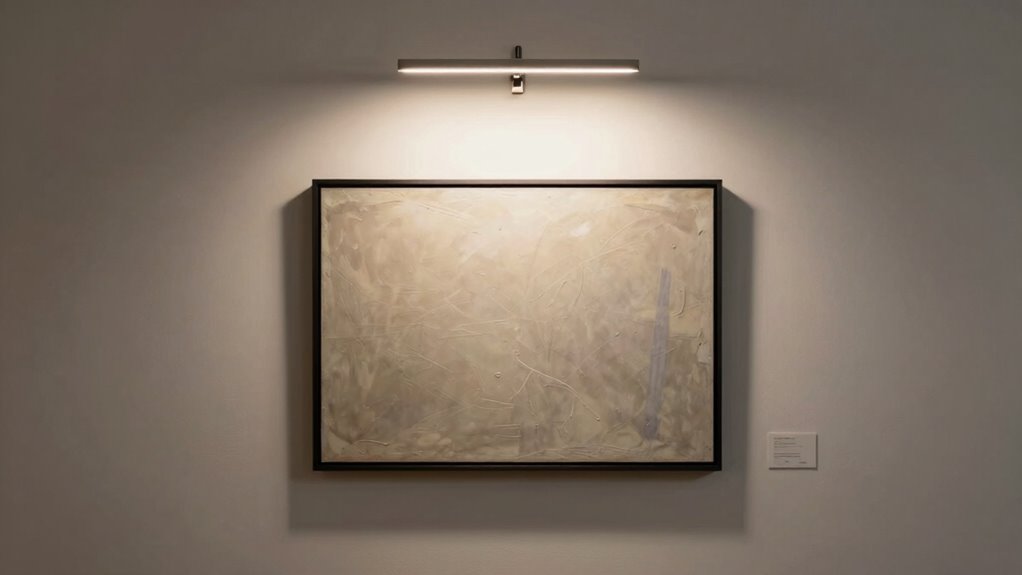
When placing picture lights, make sure you’re about 6-12 inches above the artwork and aim at roughly 30 degrees, keeping the light 12-24 inches away. Avoid direct frontal lighting to prevent glare and reflections, and consider diffusing the light for softer effects. Adjust angles gradually until you find the perfect balance between highlighting details and minimizing hot spots. If you keep these tips in mind, you’ll enhance your display—plus, there’s more to discover for ideal results.
Key Takeaways
- Proper height (6-12 inches above artwork) and 30-degree aim reduce glare and shadows for optimal viewing.
- Use diffusers and layered lighting to soften light and highlight textures without causing reflections.
- Avoid direct front lighting; position lights at 30-45 degrees to prevent glare and unwanted reflections.
- Select fixtures that complement the artwork and environment, ensuring they don’t distort colors or create distractions.
- Regularly adjust angles, height, and brightness to maintain even illumination and preserve artwork integrity.

Glendan Picture Light for Wall, Professional Art Light for Museum & Gallery
Vivid Viewing Experience: This led picture light integrates anti-glare optics, high CRI 95+, and ultra-clear projection. Visitors enjoy…
As an affiliate, we earn on qualifying purchases.
As an affiliate, we earn on qualifying purchases.
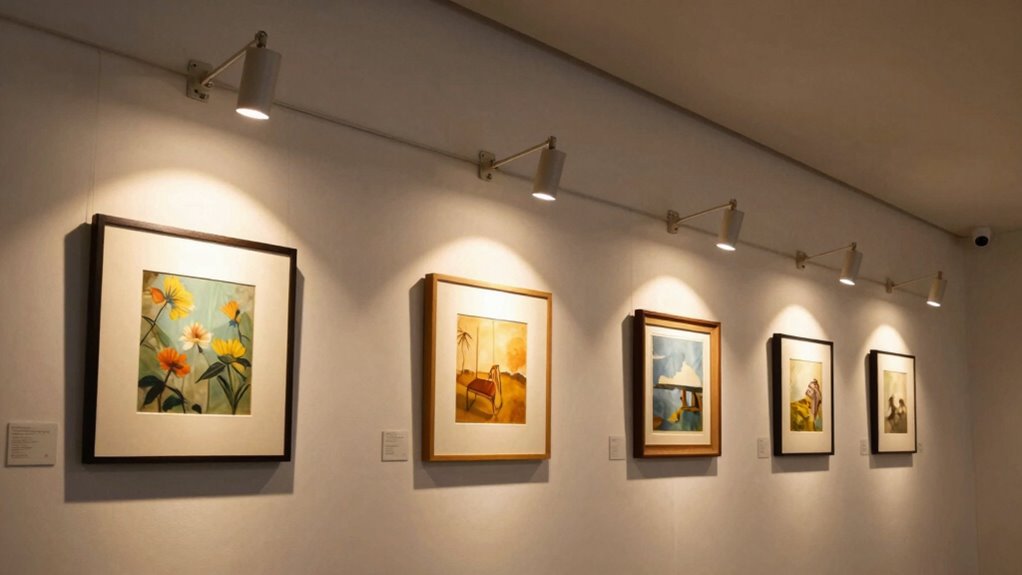
Why Proper Picture Light Placement Matters
Proper picture light placement is essential because it can dramatically enhance the artwork’s visibility and impact. When you position your light correctly, it highlights details and textures, drawing viewers’ attention. This not only elevates the aesthetic appeal but also helps in highlighting textures that add depth to the artwork. This careful placement also supports art conservation by preventing unnecessary exposure to heat or UV rays that could damage the piece over time. Additionally, proper lighting preserves color accuracy, ensuring the artwork’s hues remain true to the artist’s original intent. If your light is too harsh or poorly angled, it can cause glare or shadows, diminishing the piece’s visual appeal. By understanding the importance of strategic placement, you help maintain the integrity of your artwork while showcasing it in the best possible light, making sure it truly stands out and lasts. Proper lighting plays a key role in safeguarding artworks against environmental factors that can cause deterioration over time. Recognizing the impact of light placement can make a significant difference in how your art is perceived and preserved. Using appropriate light intensity minimizes the risk of damage and ensures the artwork remains vibrant over the years. Properly positioned lighting can also reduce energy consumption by focusing illumination only where it’s needed.
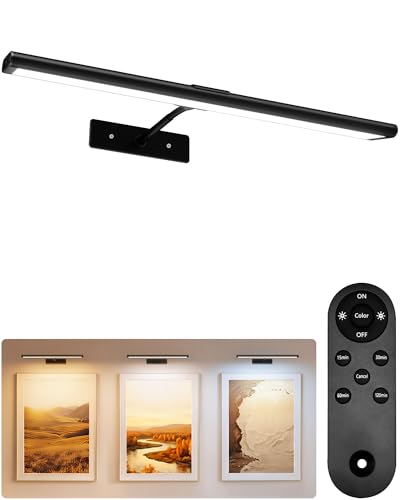
EZVALO Picture Light for Wall, 4800mAh 16'' Rechargeable Wireless IR Remote Built in Battery Lights for Painting, Dimmable Magnetic LED Art Display Light, Colors Temperatures, for Gallery, Living Room
USB Rechargeable & Easy Charge: Our picture light with with built-in 4800mAh large-capacity battery and comes with a…
As an affiliate, we earn on qualifying purchases.
As an affiliate, we earn on qualifying purchases.
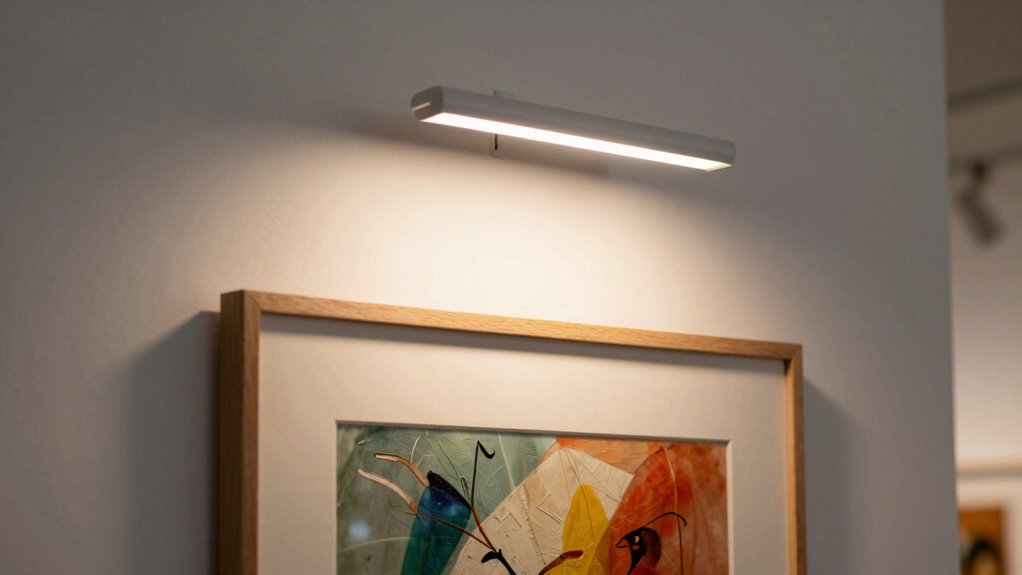
How to Find the Ideal Height for Your Picture Light
Finding the ideal height for your picture light is essential to achieving the best visual effect. You want the light to highlight the artwork without causing glare or shadows. Position the light so that it’s slightly above eye level when standing in front of the picture, usually about 6 to 12 inches above the top edge. Adjust the height based on the artwork’s size and frame, guaranteeing even illumination. Consider the color temperature—warmer tones create a cozy feel, while cooler ones offer a modern look. If your light has dimming features, use them to fine-tune brightness, avoiding harsh lighting that can distract from the art. Proper height, combined with the right color temperature and dimming, ensures your picture is showcased beautifully. Proper lighting placement is also key to enhancing the overall aesthetic and ensuring your artwork is displayed effectively. Additionally, taking into account the lighting angle can help minimize glare and shadows, providing a more polished appearance.

Coinmit 5W Plug in Picture Lights for Wall, 16" Adjustable LED Picture Light Art Light with Remote Control, 3CCT Dimmable Art Wall Light for Picture Display Frame Dartboard Art Work (Black)
【Specification】Power 5 watts. Plug-in picture light is 40 cm (16 inches) long. The plug-in power cord is 7.2…
As an affiliate, we earn on qualifying purchases.
As an affiliate, we earn on qualifying purchases.
What Angle Should Your Light Be for the Best Effect?
To achieve the best lighting effect, you should aim the picture light at an angle that minimizes glare and enhances the artwork’s details. Typically, angling the light around 30 degrees from the artwork’s surface works well, reducing reflections and shadows. Pay attention to the color temperature; a warmer tone (around 2700K-3000K) creates a cozy, inviting feel, while cooler temperatures (around 4000K) highlight details more sharply. Light diffusion is also key—using a shade or frosted cover softens harsh light and spreads it evenly across the piece. Adjusting the angle guarantees the light hits the artwork directly without causing glare, highlighting textures and colors effectively. Proper positioning balances brightness with visual comfort, making your artwork truly stand out.
dimmable picture light fixture
As an affiliate, we earn on qualifying purchases.
As an affiliate, we earn on qualifying purchases.
How Far Should Your Light Be From the Artwork?
The distance between your light and the artwork considerably impacts how well the piece is illuminated. If the light is too close, it can create harsh shadows and uneven illumination, while too far away, the artwork may appear dull or underlit. Typically, placing the light about 12-24 inches from the art works best, but this varies based on size and mounting height. Consider the color temperature; warmer tones may need closer proximity for a cozy glow, while cooler temperatures benefit from a bit more distance for clarity. Light diffusion also plays a role—using diffusers softens the light and reduces glare, especially when the light is nearer. Additionally, understanding lighting best practices can help you optimize your setup for the most flattering illumination. Properly adjusting the lighting distance can make a significant difference in highlighting the artwork’s details and colors. Experimenting with different lighting angles can reveal how the artwork’s textures and hues are perceived under various conditions, helping you find the perfect setup. Furthermore, being aware of artwork preservation considerations ensures that your lighting choices do not inadvertently damage delicate pieces over time.
Should You Use Wall-Mounted or Adjustable Picture Lights?
Choosing the right type of picture light depends on your display needs and the flexibility you want. Wall-mounted lights are a great choice if your artwork framing is fixed and you want a clean, minimalist look that complements your interior decor. They provide consistent illumination and are easy to install, making them ideal for permanent displays. Adjustable picture lights, on the other hand, give you flexibility to direct light exactly where you want it. If you frequently change your artwork or want to highlight different areas, these are a better option. They allow you to manipulate the light’s angle, enhancing your interior decor dynamically. Consider your artwork framing style and whether you prefer stability or adaptability when choosing between these two. Additionally, understanding etiquette and social norms can help you create a welcoming environment when displaying art in shared spaces. Being mindful of lighting efficiency can also contribute to sustainable living by reducing energy consumption and supporting eco-friendly practices. Opting for energy-efficient lighting options can further optimize your setup for both style and sustainability, ensuring your artwork is beautifully illuminated without unnecessary energy use. Incorporating smart lighting controls can help you tailor your lighting environment to suit different occasions and moods, adding an extra layer of customization.
Common Mistakes That Can Dull or Distort Your Artwork
Poor lighting choices can easily dull or distort your artwork, undermining its visual impact. Common mistakes include using lights that clash with your artwork’s color harmony, which can make colors appear off or washed out. Ignoring frame compatibility can also cause issues; an incompatible frame might reflect light poorly or create unwanted glare. Additionally, placing lights too close or too far from the art can cast uneven shadows or cause color distortion. To avoid these issues, understanding how market analysis influences consumer preferences can help you select the best lighting options that enhance your artwork’s display. Selecting the right lighting techniques can further ensure that your artwork’s true colors and textures are preserved. Using overly warm or cool bulbs that disrupt color harmony, installing lights at an incorrect angle, affecting how colors are perceived, and choosing fixtures that don’t complement the frame—causing distractions or reflections—are common pitfalls. Proper lighting placement is crucial, as it directly impacts the way viewers perceive the artwork’s details and overall aesthetic. Avoid these pitfalls to preserve your artwork’s true colors, texture, and overall aesthetic.
How to Avoid Glare and Reflections on Your Art
To prevent glare and reflections on your artwork, pay attention to the light angles you choose. Position your lights so they shine at an ideal angle, avoiding direct reflections. Using diffused lighting can also soften harsh spots and give your art a more even, glare-free appearance. Incorporating well-designed lighting can enhance the overall relaxation and wellness of your space while protecting your artwork.
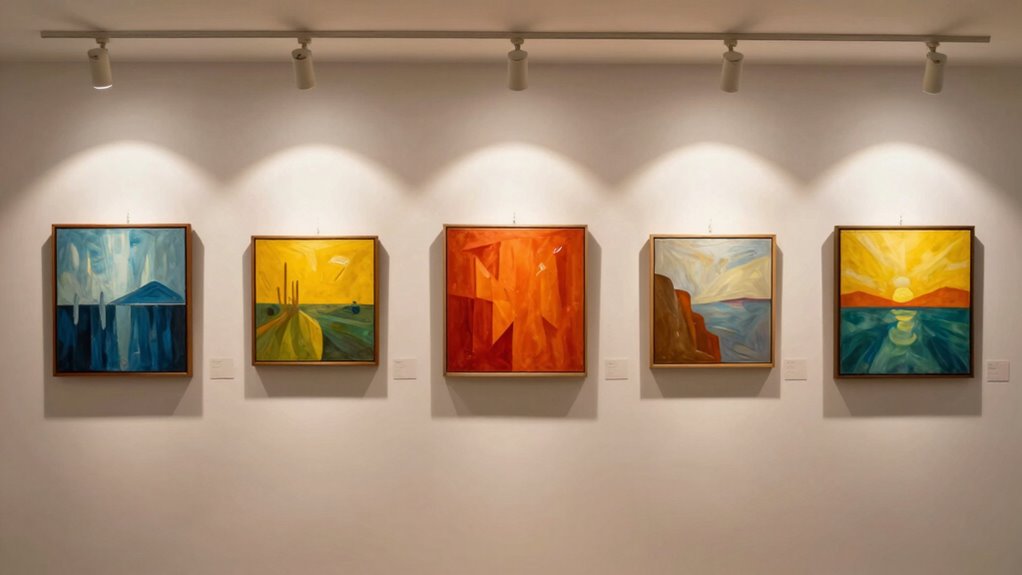
Optimal Light Angles
When positioning your lights, it’s essential to find the right angles to minimize glare and reflections on your artwork. Proper angle adjustment ensures your pieces are showcased without unwanted distractions, critical in artistic photography and gallery curation. To optimize light angles, consider these tips:
- Keep lights at a 30-45 degree angle from the artwork to reduce direct reflections.
- Avoid placing lights directly in front of the piece, which can cause glare.
- Experiment with slight adjustments to find the sweet spot where light enhances details without creating harsh reflections.
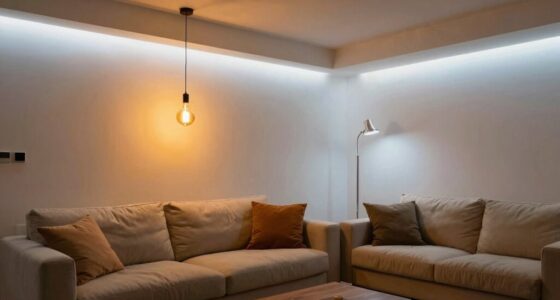
Use Diffused Lighting
Using diffused lighting is one of the most effective ways to prevent glare and reflections on your artwork. Diffused lighting provides soft illumination that evenly spreads light across the surface, reducing harsh shadows and shiny spots. To achieve this, opt for fixtures with frosted bulbs or use lampshades that disperse light gently. Position your light source at an angle to the artwork to minimize direct reflections. Avoid placing lights directly in front of the piece, which can create glare, and instead, aim for a more indirect approach. This setup enhances the viewing experience by maintaining clarity and color accuracy while keeping reflections at bay. Proper use of diffused lighting guarantees your art is showcased beautifully without unwanted distractions. Additionally, understanding how lighting placement impacts glare can help you refine your setup for optimal visual appeal, ensuring your artwork always looks its best. Being mindful of ambient light levels can further help in controlling reflections and glare, creating a more professional display.
How to Highlight Details Without Overlighting
To highlight details without overlighting, use layered lighting techniques that combine different light sources for balance. Focus your lights on key areas rather than the entire piece, and avoid overly bright spots that can distract from the artwork. This method also helps create a natural, inviting glow that enhances the overall ambiance of your space.
Use Layered Lighting Techniques
Layered lighting allows you to highlight specific details and create depth without overwhelming a space with brightness. By combining different light sources, you can control the ambient ambiance and emphasize your artwork’s best features. Use softer, indirect lighting to set a warm background, then add targeted fixtures to highlight key details. This balance prevents overlighting and guarantees your picture remains the focus. Consider color correction to enhance colors without distorting the artwork’s true hues. Incorporate these techniques:
- Use dimmable fixtures for adjustable brightness
- Mix warm and cool tones for depth
- Place accent lights at strategic angles for ideal highlighting
This approach guides the viewer’s eye naturally and maintains a harmonious visual flow.
Focus on Key Details
Focusing on key details requires careful placement of lighting that emphasizes specific features without overwhelming the entire artwork. To do this, adjust the color temperature so the light complements the artwork’s tones—warmer temperatures create intimacy, while cooler ones highlight crisp details. Control light intensity to avoid washing out key features; a softer, concentrated beam ensures the details stand out without overpowering the scene. Position the light at an angle that casts gentle shadows, adding depth and dimension. Remember, the goal is to draw attention to specific textures or colors without creating glare or bright spots that distract from the overall piece. Fine-tuning these elements helps you highlight essential details subtly and effectively.
Avoid Overly Bright Spots
Even when highlighting details, it’s important to prevent bright spots from overpowering the artwork. Overlighting can cause glare and distort the piece’s true colors. To avoid this, pay attention to color temperature—using warmer tones creates a softer, more natural glow, while cooler tones can be harsher. Light dimming is essential for fine-tuning brightness levels, ensuring you highlight details without overwhelming the piece.
Consider these tips:
- Adjust color temperature for a balanced, natural look
- Use dimming controls to soften overly bright spots
- Position the light to evenly distribute illumination without creating hotspots
Using Multiple Picture Lights for a Balanced Look
Using multiple picture lights can create a more balanced and visually appealing display, especially when you have larger or irregularly shaped artworks. To achieve this, consider color coordination; choosing lights with similar color temperatures ensures a cohesive look that highlights your artwork without clashing. When selecting lights, pay attention to frame selection—placing lights to evenly illuminate the frame’s edges prevents shadows and emphasizes details. Position the lights so they complement each other, avoiding hotspots or uneven brightness. If your artwork has multiple sections, use separate lights for each area, but keep their placement consistent for harmony. This approach enhances the overall aesthetic, making your art stand out while maintaining a tidy, unified appearance.
Tips for Testing and Adjusting Your Light After Installation

After installing your picture lights, it’s essential to test and adjust them to achieve the desired effect. First, check the light’s position to guarantee even coverage and avoid glare or shadows. Adjust the angle and height to enhance color accuracy, making sure the artwork’s hues appear true to life. Keep in mind, proper placement can also extend bulb longevity by reducing unnecessary strain. To fine-tune your setup, consider these tips:
- Use dimmable bulbs to easily control brightness and ambiance.
- Test the light at different times of day to see how natural and artificial lighting interact.
- Regularly clean fixtures to maintain peak brightness and color accuracy.
These steps help you create a stunning display that’s both vibrant and efficient.
Frequently Asked Questions
Can Picture Lights Damage or Fade Artwork Over Time?
Yes, picture lights can damage or fade artwork over time if they emit UV rays or generate heat damage. UV rays can cause colors to fade, while heat buildup may warp or crack delicate materials. To protect your artwork, choose lights with UV filters and low heat emission, and avoid placing lights too close or leaving them on for extended periods. Proper placement and lighting choices help preserve your art’s vibrancy.
What Types of Bulbs Are Best for Picture Lighting?
The best bulbs for picture lighting are LED bulbs because they emit less heat and UV rays, helping preserve your artwork. Incandescent options are traditional but produce more heat and UV, which can damage art over time. Choose LED picture lights with adjustable brightness and a color temperature around 3000K for a warm, natural glow. This guarantees your artwork stays vibrant while being properly illuminated.
How Do I Choose the Right Style of Picture Light?
You choose the right style of picture light by balancing artistic illumination with fixture selection. Think about the artwork’s mood—sleek and modern or ornate and traditional—and pick a fixture that enhances that style. Consider the wall color and room decor to guarantee harmony. Your goal is to make the artwork stand out without overwhelming it. By matching the fixture’s design to the piece’s character, you create a cohesive and enthralling display.
Is It Better to Install Picture Lights Before or After Hanging Art?
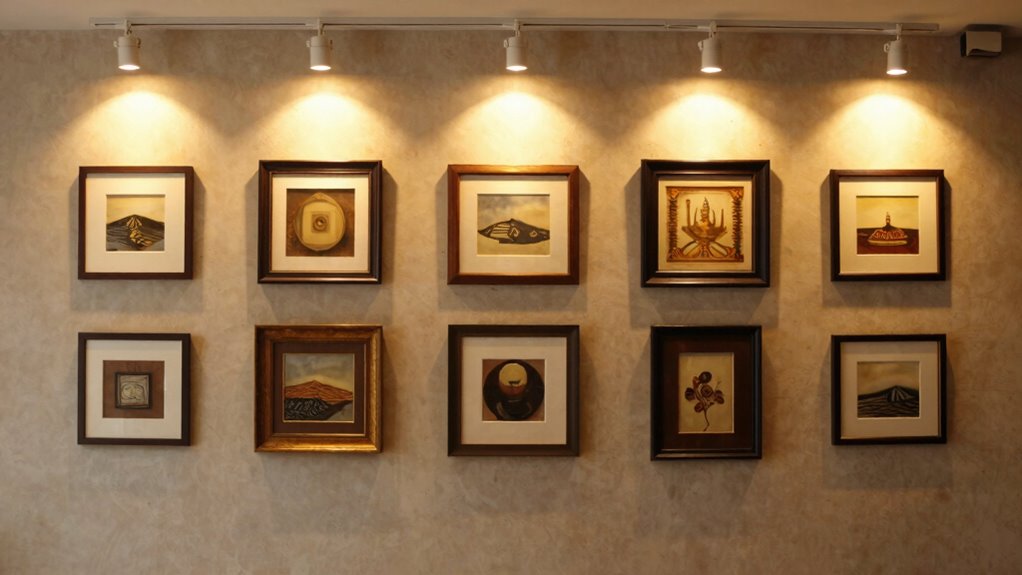
It’s better to install picture lights after hanging your artwork, especially for a gallery wall, so you can adjust the lighting precisely. When you’ve selected the perfect frames, hang your art first, then position the lights to highlight each piece. This approach guarantees ideal frame selection and lighting angles, creating a cohesive display. Adjusting lights afterward helps you avoid unnecessary repositioning, giving your gallery wall a polished, professional look.
How Often Should I Adjust or Replace My Picture Lighting?
You should adjust or replace your picture lighting every 6 to 12 months. Did you know that improper lighting angles can fade artwork up to 30% faster? Regularly check your lights, especially if you notice dimming or uneven illumination. Keep bulbs within their lifespan, usually 1,000 hours, to maintain maximum brightness. Adjust lighting angles as needed to prevent damage and keep your art looking its best over time.
Conclusion
When it comes to illuminating your artwork, proper light placement isn’t just an art—it’s a science. Believe it or not, research shows that strategic lighting can enhance details, evoke mood, and even protect your art from damage. So, don’t just guess; experiment with angles and distances until you find what truly makes your pieces shine. With a little patience and attention, you’ll create a display that’s both stunning and scientifically sound.